

01 – 1 Landscape – Dunedin Southern Coast
Decisions to achieve the desired result: I took 11 varied shots to find the right composition. As the tide was moving, fast and I had to avoid immersion. To get this image I was up before the sun to get to the location. I had seen this area before – prior research. I used the foreground rocks and their lines to lead the viewer towards the horizon and the big rock. It works in portrait orientation. To create the movement I used an ND 16 filter, Tripod, mirror lock and 2 sec timer. The trick was setting the camera off to time with where I required the water. I also waited for the low autumn light to shine across the rocks to give it a warmer and refined feel to the structure of the rocks. Choice of lens was 16-35mm. 16mm enabled the image to capture a wider field of view and balance the foreground rocks with the big rock.
Processing: RAW – Extension of shadows/Highlights. Lens and Chromatic adjustment made. Convert to Smart Object then Use of curves to build contrast, adjustment of hue/saturation to give slight emphasis of warmer colour, slightly straighten of the horizon, sharpening on the final image.
Image Settings: Canon EOS 5D Mark IV, f/22, 2sec, 16mm, ISO-100
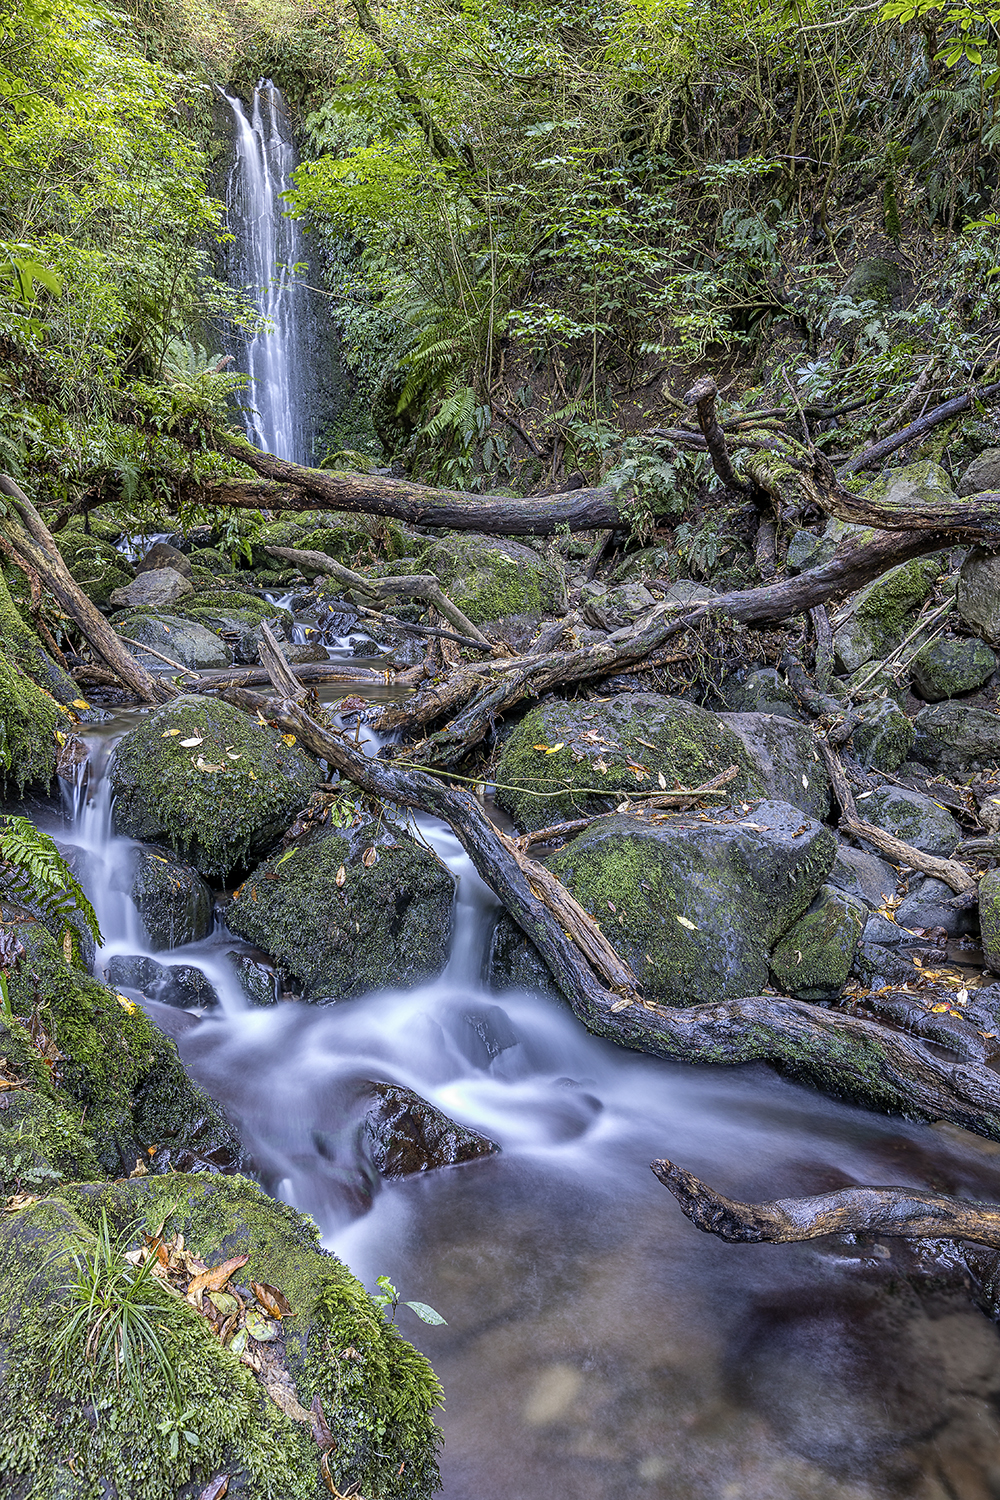
02 – 2 Landscape – Nichols Falls
Decisions to achieve the desired result: 20-minute walk and we were at the local falls. To create the water movement I used an ND 16 filter, Tripod, mirror lock and 2 sec timer. Portrait worked to lead the viewer’s eye from the foreground water to the waterfall. The debris was a worry, as this could be distracting. However, I do not think it is now. It provides a nice break from waterfall to the foreground water. Choice of lens 16-35mm gave me options to capture a wide field of view. Adjustment to 26mm was about right. f/11 is a sweet spot for the 16-35mm, and this worked fine for depth of field.
Processing: RAW – Extension of shadows/Highlights. Lens and Chromatic adjustment made. Convert to Smart Object then Use of curves to build contrast, adjustment of hue/saturation to bring out greens, sharpening on the final image.
Image Settings: Canon EOS 5D Mark IV, f/11, 13sec, 26mm, ISO-100

03 – 1 Portrait – Mother/Daughter 1
Decisions to achieve the desired result: Capturing these people in a relaxed and natural look took quite a few images to work towards the right shot – to be expected. I adjusted my angle of view to ensure I was at their level. I used one separate fill-in flash at 1/64 from the floor and one studio light with a diffuser umbrella to spread even light from the left side looking down toward the subjects. Natural light in the room highlighted the mother’s hair from behind nicely. The focus was on the mother eyes. Given the low shutter speed (1/160sec) concentration on hold the camera steady and capturing the moment without movement was crucial. Choice of the lens – 85mm is a choice lens for portraits lending itself to potential flattering result. This lens does not focus that fast so allowing for this is important.
Processing: Processing: RAW – Extension of shadows/Highlights. Lens and Chromatic adjustment made. Convert to Smart Object then Use of curves to build contrast, adjustment of hue/saturation to bring colours slightly, white balance adjusted for correct skin tones, sharpening of eyes, gentle sharpening on final image so as not to make the skin harsh.

04 – 2 Portrait
Mother/Daughter 2
Decisions to achieve the desired
result: I remember – a photo session is
never finished until they have completely gone! – I did more images in
the garage. As getting ready to pack and leave, I took this image just before
they left. The background is non-distracting, and
I caught the moment looking back at the right time. Settings were a faster
shutter speed (1/250sec) as I knew it was going to be quick – to reduce
movement. Shutter priority set. No flash. Therefore, the ISO was set high to
allow enough light to get through the lens.
Processing: Processing: RAW – Extension of
shadows/Highlights. Lens and Chromatic
adjustment made. Convert to Smart Object then Use of curves to build
contrast, adjustment of hue/saturation to bring colours slightly, white balance
adjusted for correct skin tones, sharpening of eyes, gentle sharpening on the final
image so as not to make the skin harsh.
Image Settings: Canon EOS 5D Mark IV, f/2, 1/250sec,
85mm, ISO-800

05 – 1 Architecture -
Te Pā Tauira
Decisions to achieve the desired
result: I chose a Dutch angle to
accentuate the windows and colours. Also,
the reflection of the trees in the right-hand window gave some interest. This
window helps to connect with the other
window areas on the building. The downpipe
gives a natural divide from the window louvres and the window on the left. Use
of 200mm enabled me to concentrate on a feature of the building and low my
angle of view. Shutter speed allowed me to hand hold the shot.
Processing: RAW – Extension of shadows/Highlights. Lens and Chromatic adjustment made. Convert to
Smart Object then Use of curves to build contrast, adjustment of hue/saturation
to bring out oranges, sharpening on the final image.
Image Settings: Canon EOS 5D Mark III, f/11, 1/80sec,
200mm, ISO-800

06 – 2 Architecture –
Forsyth Bar Stadium
Decisions to achieve the desired
result: The late afternoon sun was gleaming onto the west side of the
building, so I framed the windows. The
colours drew me to this image. I used the natural angle with a long lens
(200mm) to emphasise the windows.
Although I shot at an angle, the straight lines of the windows offset the image.
Processing: RAW – Extension of shadows/Highlights. Lens and Chromatic adjustment made. Convert to
Smart Object then Use of curves to build contrast, adjustment of hue/saturation
to bring out blues, slight vignette added to give the middle windows more
focus, sharpening on the final image.
Image Settings: Canon EOS 5D Mark IV, f/5.6,
1/250sec, 200mm, ISO-100

07 – 1 Street Photo –
Street Singer
Decisions to achieve the desired
result: I spent some time to get close to the performers and chatted to get
to know them. They felt comfortable me shooting, so I clicked. Using High
Continuous shooting to capture the action, freeze movement and have the
background out of focus. I used a low angle to look up and emphasise the performer. The use of a Dutch
angle gives a quirky angle. Also, there
are other people in the background to help tell more story that the location is
at a market.
Processing: Processing: RAW – Extension of
shadows/Highlights. Lens and Chromatic
adjustment made. Convert to Smart Object then Use of curves to build
contrast, adjustment of hue/saturation to bring colours on the clothing; I used
ACR to dull the surrounding colours, so
the subject is emphasised white balance
adjusted for correct skin tones, sharpening on the final image. (no flash
used).
Image Settings: Canon EOS 5D Mark III, f/4, 1/400sec,
35mm, ISO-160

08 – 2 Street Photo –
Guitar Man
Decisions to achieve the desired
result: Same approach as 07 images.
Using High Continuous shooting to capture the action, freeze movement and have
the background out of focus. I used a low angle to look up and emphasise the performer. The use of a Dutch
angle gives a quirky angle. The image was shot
into the sun with no flash, the position
was tricky to have the sun just poking over the fingerboard/neck
of the guitar. The fast shutter speed could have been slowed down in hindsight
to get movement in the strumming hand. Moreover, maybe a wider frame to capture the
market more.
Processing: Processing: RAW – Extension of
shadows/Highlights. Lens and Chromatic
adjustment made. Convert to Smart Object then convert to greyscale, Use of curves to build contrast,
sharpening on the final image. (no flash used).
Image Settings: Canon EOS 5D Mark III, f/8,
1/1000sec, 35mm, ISO-160
No comments:
Post a Comment